Final code structure overview
In this case, I wanted the streamlit deployment to be part of a larger repo with multiple tools/packages that use a common environment. As a result, the repo is structured with a top level package code_package under which we’ll make our streamlit directory. In the same repo as the code_package directory, we have our .github directory for workflows and a variety of other files such as the Dockerfile or Makefile. Sample code repo here.
sample-streamlit-deploy
    .github/workflows/
        docker-push.yml
        update-streamlit.yml
    code_package/
        streamlit/
            pages/*
            Home.py
            requirements.txt
            start.sh
    Dockerfile
    Makefile
    docker-compose.yml
    environment.yml
To start, just make an empty repo and clone it locally. All of the files and directories to be added will be described as we go.
Getting started with streamlit
We can start by making our code_package directory, and under this, the streamlit directory.
We want to structure this as a multipage app with multiple individual applets accessible via a sidebar. Following the official docs for this, we make a pages directory under streamlit for individual applets and make a Home.py file:
import streamlit as st
st.set_page_config(
page_title="Hello",
page_icon="👋",
)
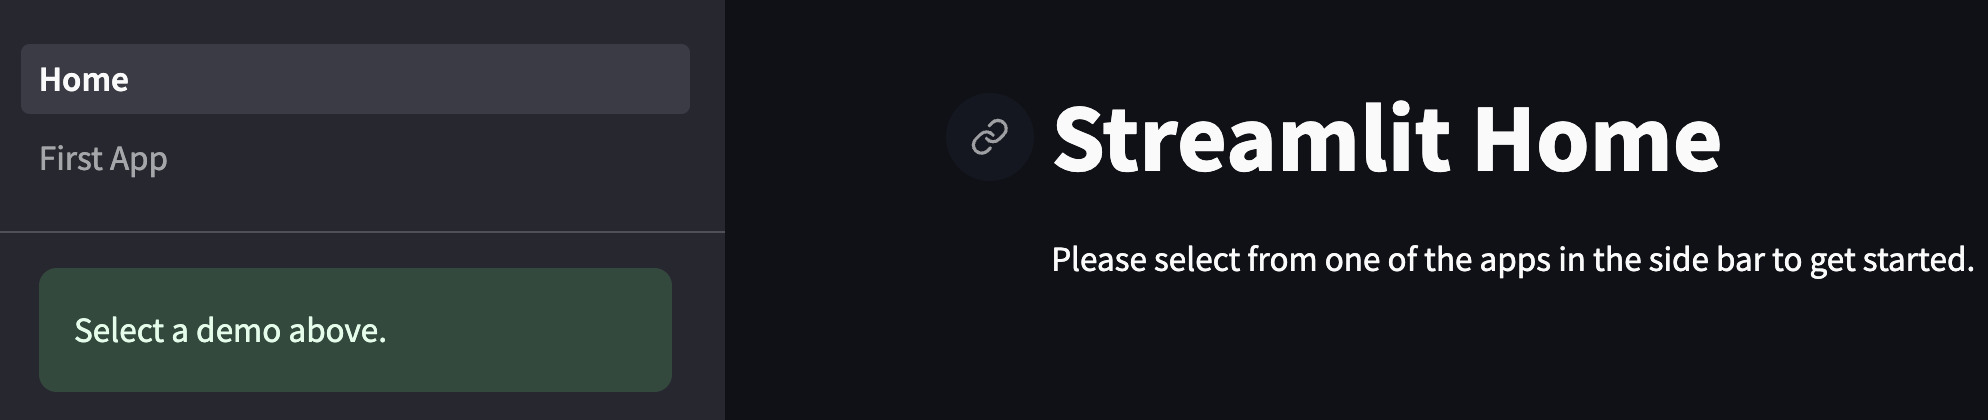
st.write("# Streamlit Home")
st.sidebar.success("Select a demo above.")
st.write("Please select from one of the apps in the side bar to get started.")
Then we can make our first page in pages/1_First_App.py as follows:
import streamlit as st

st.title("First streamlit app")
st.write("TODO: implement")
Then to start the streamlit server, run streamlit run mwcore/streamlit/Home.py. You should be able to access the app at localhost:8501 in browser.
If you hadn’t already, you may have to run pip install streamlit in your terminal first. In our next steps, we’ll set up our conda environment and Dockerfile to handle dependencies in a more reproducible way.
Making a reproducible environment
Our next goal is to set up a development environment which is reproducible so that even as we add dependencies, we can count on our app running in a consistent manner on our computer, other peoples’ computers, and even in a remote deployment! We’ll use conda to specify dependencies and docker to package this all into a runnable image.
Conda environment file
Many streamlit tutorials use pip because it’s generally a bit simpler if all you need to do is install a list of python packages in a requirements.txt file. However, pip can only specify python packages, while conda can specify a variety of python and non python dependencies. Even if your streamlit app doesn’t directly use some of these, it can be nice to specify a docker image with dependencies for the whole repo so that the streamlit app can launch asynchronous containerized jobs which may need to do more complex computations.
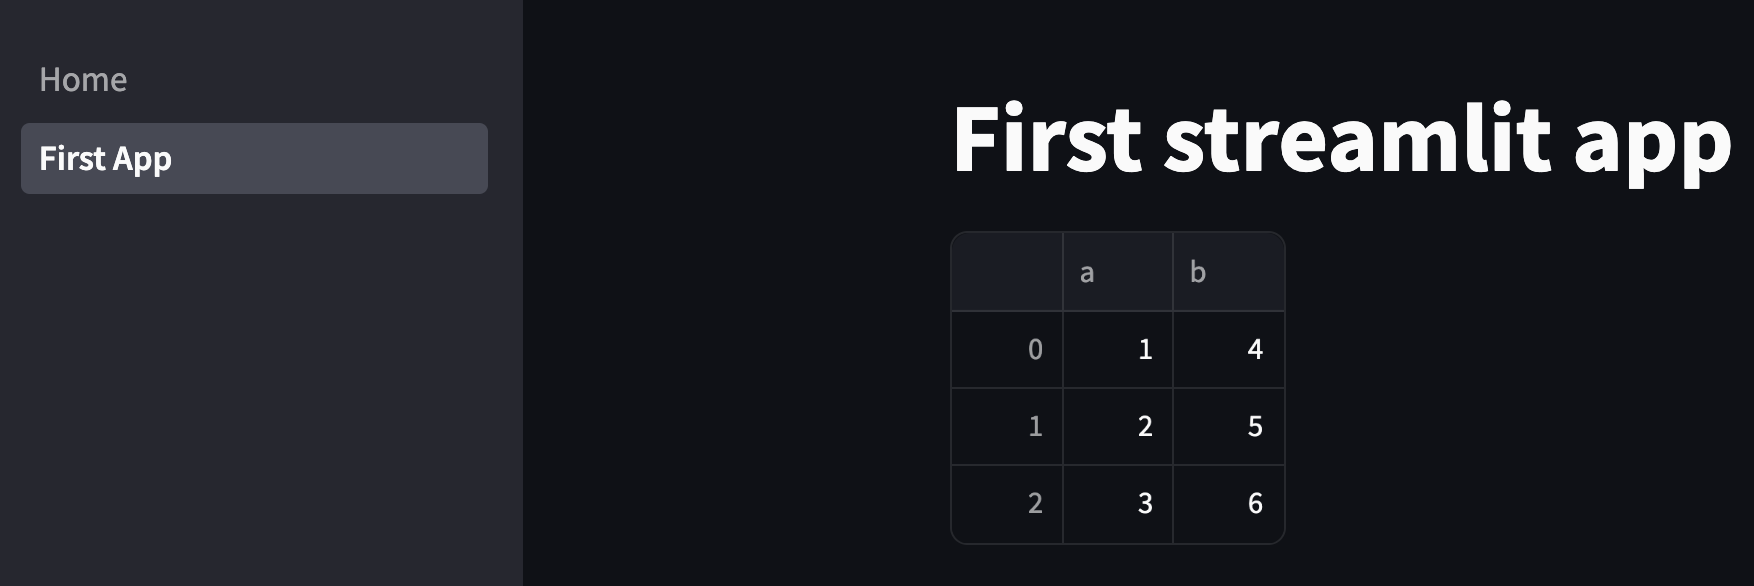
I’d like to put a pandas dataframe into our example app, so I’m going to modify the 1_First_App.py:
import pandas as pd
import streamlit as st

st.title("First streamlit app")
st.write(pd.DataFrame({"a": [1, 2, 3], "b": [4, 5, 6]}))
If you don’t already have pandas installed, then this will fail. In either case, let’s set up our conda environment. First, let’s create environment.yml in the top level directory:
name: mwcore
channels:
  - defaults
dependencies:
  - python=3.11
    - pandas
Then, we can create the environment by running conda env create -f environment.yml and activate it by running conda activate env_name. If you try running running this, you’ll notice we still need to pip install streamlit. We can do so by modifying environment.yml as follows:
name: env_name
channels:
  - defaults
dependencies:
  - python=3.11
  - pandas
  - pip:
    - streamlit
The reason we don’t just include streamlit as a top level conda dependency is that for some reason, this works and that doesn’t. Now you can just run pip install streamlit in the env, but if you want to just create the env fresh, you’ll see you have to remove the old env first. If you do so, create the new env, and run streamlit, you’ll see this:
Next, let’s use Docker so that we can create the environment as part of making the container. This will make it easy to iteratively develop our application while knowing it’ll run the same locally as anywhere else!
Docker image generation
Add these lines to Dockerfile:
FROM mambaorg/micromamba:1.5.3-jammy-cuda-12.1.1
USER root
WORKDIR /app

#create the environment for the run
COPY environment.yml .

RUN micromamba install -y -n base -f environment.yml && \
    micromamba clean --all --yes
# Put env activation into bashrc for running in shell
RUN echo "micromamba activate base" >> ~/.bashrc
ENV PATH /opt/micromamba/envs/$(head -1 environment.yml | cut -d' ' -f2)/bin:$PATH

RUN apt-get update && apt-get install vim libglib2.0-0 -y
ARG MAMBA_DOCKERFILE_ACTIVATE=1

COPY code_package ./code_package
I won’t go into too much detail here, but will point out a few details. We use micromamba instead of conda because it’s optimized to keep images small and image building time short. Then we install the environment into the base environment and also add the activation into the bashrc. Later, this will make it so that we can run an interactive docker shell for debugging and development.
Since the streamlit dependency is only needed for the streamlit app and not necessarily for running arbitrary containerized tasks, I decided to actually remove it from our environment and install it as part of a command in code_package/streamlit/start.sh (make sure to make this executable by running chmod +x code_package/streamlit/start.sh before committing):
#!/bin/bash
pip install -r mwcore/streamlit/requirements.txt && streamlit run mwcore/streamlit/Home.py --browser.gatherUsageStats False
with code_package/streamlit/requirements.txt:
streamlit
This also lets us easily specify that we don’t want the browser to gather usage stats by default. You might wonder why we don’t just have a separate environment for potential containerized tasks that has just what dependencies they need. I think handling a bunch of similar environments might get messy, and in this case, streamlit itself is a pretty heavy dependency that I’m happy to separate out while keeping the main env as is.
To make dealing with docker images more convenient, we can add a docker-compose.yml:
version: '3'

services:
    streamlit:
    image: img_name:latest
    command: code_package/streamlit/start.sh
    platform: linux/amd64
    ports:
      - "8501:8501"
    volumes:
      - ./code_package/:/app/code_package/
and a Makefile:
build:
    docker build --platform linux/amd64 . -t img_name:latest

clean:
    docker system prune -a

streamlit:
    docker-compose up streamlit
Then to run streamlit in docker, all we have to do is run the following commands:
make build
make streamlit
If you end up changing dependencies, then you can rerun make build to update the saved image. Otherwise, every time you want to start up the app in the future, you can just run make streamlit.
If you find your disk is filling up with images, you can run make clean to clear them. Also if you ever want to have an interactive shell with the environment set up to test functions your streamlit app might call, you can run make shell to start it up.
Deployment
Our next step is to set up our actual deployment! To optimize for ease of updating, we’re going to use ECS on AWS, which is made to run containerized services. First, we’ll set up a github workflow to build and push docker images to ECR on AWS. Then we’ll set up our ECS deployment to use this image. Finally, we’ll make a second github action to trigger an ECS service update after a new image is pushed.
Github action to push docker image to ECR
When code is pushed to the main branch of our repo, we want a github action to build and push a docker image to ECR. We can add a .github/workflows/docker-push.yml:
on:
  push:
    branches: [ main ]

name: AWS ECR push

jobs:
  deploy:
    name: Deploy
    runs-on: ubuntu-latest

    steps:
    - name: Checkout
      uses: actions/checkout@v2

    - name: Configure AWS credentials
      uses: aws-actions/configure-aws-credentials@v1
      with:
        aws-access-key-id: ${{ secrets.AWS_ACCESS_KEY_ID }}
        aws-secret-access-key: ${{ secrets.AWS_SECRET_ACCESS_KEY }}
        aws-region: us-east-1

    - name: Login to Amazon ECR
      id: login-ecr
      uses: aws-actions/amazon-ecr-login@v1

    - name: Build, tag, and push the image to Amazon ECR
      id: build-image
      env:
        ECR_REGISTRY: ${{ steps.login-ecr.outputs.registry }}
        ECR_REPOSITORY: ${{ secrets.REPO_NAME }}
        IMAGE_TAG: latest
      run: |
        docker build -t $ECR_REGISTRY/$ECR_REPOSITORY:$IMAGE_TAG .
        echo "Pushing image to ECR..."
        docker push $ECR_REGISTRY/$ECR_REPOSITORY:$IMAGE_TAG
        echo "::set-output name=image::$ECR_REGISTRY/$ECR_REPOSITORY:$IMAGE_TAG"
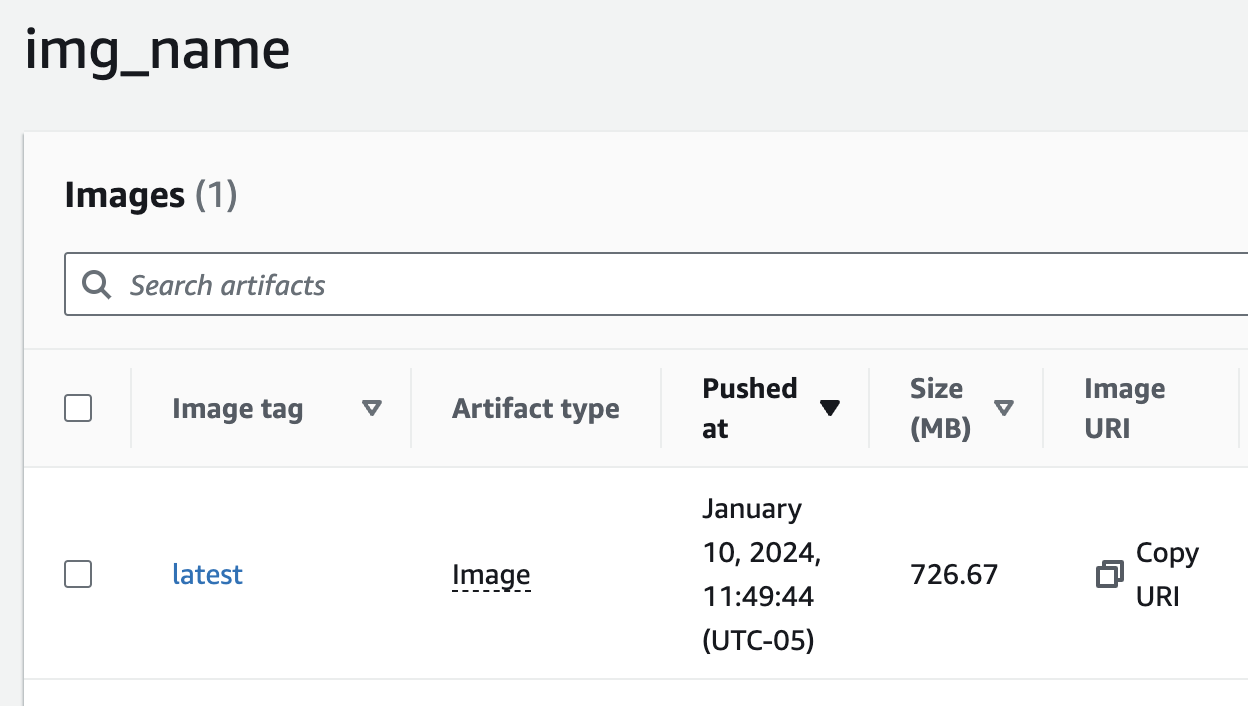
For this to work, you’ll have to add your AWS_ACCESS_KEY_ID, AWS_SECRET_ACCESS_KEY, and REPO_NAME to your github repo as secrets. You can set REPO_NAME to whatever you want, but in this example, I’ll use img_name. Then you can go to ECR in the AWS console and create a new repo with the same name. To minimize ECR storage fees, I’d advise setting a lifecycle policy to expire untagged images a week after pushing (pretty straightforward in the console).
If you don’t already have an AWS account and IAM user within it, you may need to create these. If you are creating a user from scratch, in the Set permissions stage, you can select Attach policies directly then AdministratorAccess. In a company setting, you may want to limit these, but this works as a shortcut for now. Also, long-term best practice is probably to make this user be specific to github actions for the most granular permission specifications, but for this tutorial, I’m not going to go into depth for that.
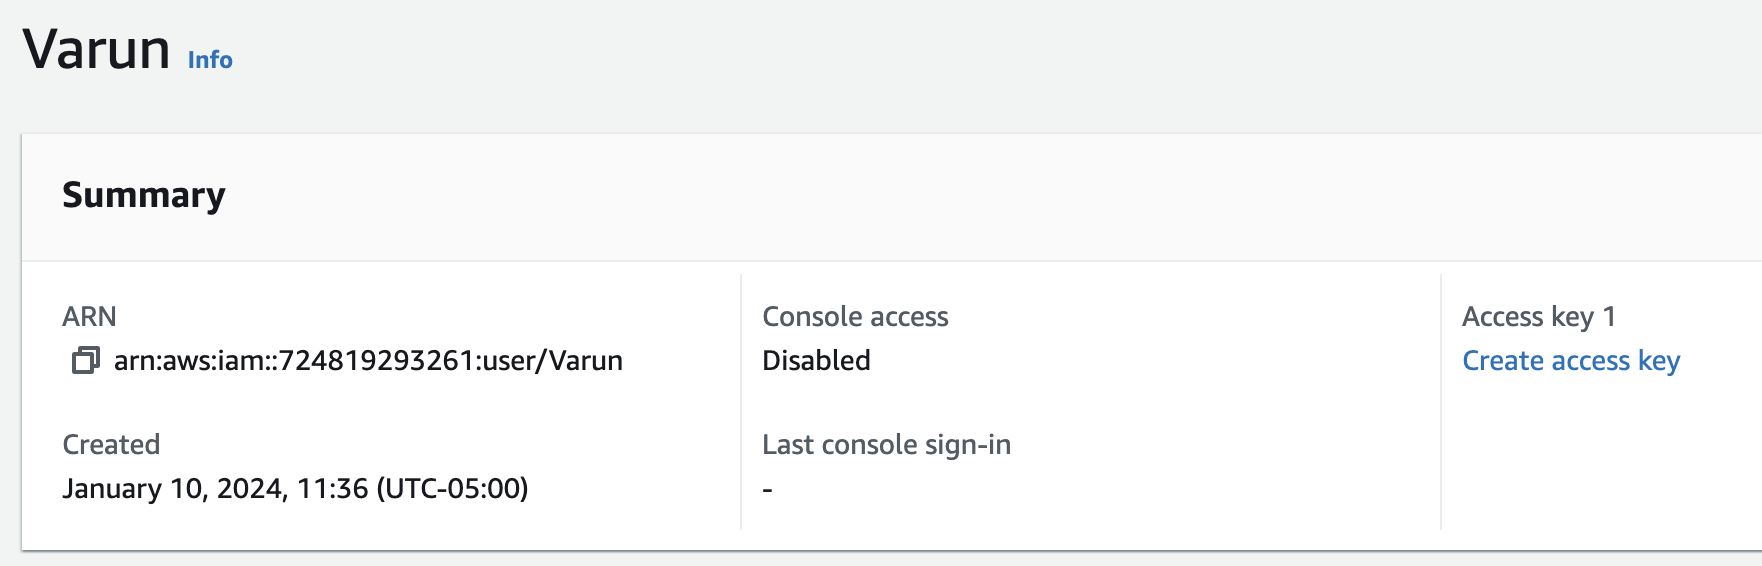
Once you’ve created the user and navigated to its page in the console, you can create an access key. Confirm that you understand the security recommendations, then generate the key. When the key is shown, my recommendation is to store it somewhere safe like a password manager as it won’t be retrievable later. Then, you can add these into your github repo as secrets as well!
Now it’s time to push the code to your repo! Long term best code practice would be to protect the main branch and require PRs for pushing code to main, but we won’t go into that for this blog post.
If you’ve included the docker push github action, then you should see the workflow run begin in the Actions page. Mine finished in around 2 minutes, and when I went to the ECR img_name repo page on AWS, the image was pushed!
Local development with remote container
Now that we push a container to ECR for our eventual deployment, we can use that for local development to avoid having to build the container and to better emulate prod functionality. We can modify the docker-compose.yml to distinguish between streamlit (using remote container) and streamlit-local (using local container):
version: '3'

services:
  streamlit:
    image: <aws account id>.dkr.ecr.us-east-1.amazonaws.com/img_name
    command: code_package/streamlit/start.sh
    platform: linux/amd64
    ports:
      - "8501:8501"
    volumes:
      - ./code_package/:/app/code_package/

  streamlit-local:
    image: img_name:latest
    command: code_package/streamlit/start.sh
    platform: linux/amd64
    ports:
      - "8501:8501"
    volumes:
      - ./code_package/:/app/code_package/
and we can also update the Makefile:
ecr-login:
    aws ecr get-login-password --region us-east-1 | docker login --username AWS --password-stdin <aws account id>.dkr.ecr.us-east-1.amazonaws.com

img-pull:
    docker pull <aws account id>.dkr.ecr.us-east-1.amazonaws.com/mwcore-cpu

build:
    docker build --platform linux/amd64 . -t img_name:latest

clean:
    docker system prune -a

streamlit:
    docker-compose up streamlit

streamlit-local:
    docker-compose up streamlit-local
Besides renaming streamlit to streamlit-local and adding the new streamlit here, we’ve also added a command to authenticate docker with ECR credentials, which is needed before pulling images from ECR. While make streamlit will then pull the image, if the image is already cached locally and we want to refresh it, we can use make img-pull.
ECS deployment
Now that we have an image on ECR, it’s time to run streamlit in that image using ECS. Go to the ECS page on AWS and create a new cluster. I named mine streamlit-cluster and left the default of Fargate as the compute infrastructure. This will take a few minutes to spin up.
Meanwhile, we can create our Task definition. Also in ECS, go to the Task definitions page and create new. I named mine streamlit-server and left the rest of the infrastructure settings as default (Task role = None, Task Execution Role = Create new role (if first time) or ecsTaskExecutionRole). Then scroll to the Container - 1 section. Here, set the following:
- Name:
img_name - Image URI: copied from ECR
- Port Mappings: add a new one with Container port as 8501 (in addition to initial one for port 80)
- Scroll down to Docker configuration
- Command:
/usr/local/bin/_entrypoint.sh,./code_package/streamlit/start.sh
- Command:
Then you can you finish creating the task definition. Before we deploy it, we need to configure our networking. By default, if you were to create the service then try to access the DNS name for the load balancer (to be created) or the public IP address for the running task (of the future service), neither will be accessible. We want to make a custom security group first for the load balancer to allow public access, then for the task to allow only load balancer access.
Go to Security Groups page in the AWS console and first create streamlit-alb-sg where an single inbound rule set with Type: All Traffic and Source: Custom 0.0.0.0/0. This will generate a warning about access from all IP addresses, but this is fine. Once you’ve created this group, you can make your streamlit-task-sg with an inbound rule set with Type: All Traffic and Source: Custom <security group ID for streamlit-alb-sg> (which generally looks like sg-...).
Now we can create our service. On the task definition page, you can select Deploy and Create service from the dropdown menu. Select your ECS cluster, then set a name (like streamlit-service). Then scroll down to Networking and set the security group to streamlit-task-sg. Then scroll down to Load Balancing and select Application Load Balancer and create a new one. I called mine streamlit-alb. I changed the container to load balance from img_name 80:80 to img_name 8501:8501. I left the default listener and created a new target group called streamlit-tg with the default settings.
Given that we’re keeping the default of 1 target instance task for our service, you might wonder why we need a load balancer. In this case, we add it primarily for the fact that it gives us a static IP (and alb domain name) that we can use to access our app. Technically each task has a public accessible IP address, but whenever we update our app, the old task is replaced with a new one with a new IP address.
Once you hit Create, it’ll take a few minutes for the service to spin up. While it does so, let’s set the security group for the load balancer. Once the service is visible under the cluster, select the service then select View load balancer. Then select Actions and Edit security groups. Remove the default (which should be streamlit-task-sg) and add streamlit-alb-sg.
If everything was set up correctly, you should be able to access your streamlit app at the DNS name provided on the load balancer page (of the format streamlit-alb-<...>.us-east-1.elb.amazonaws.com).
Github action to update streamlit service
Now that our streamlit deployment is live, we need to set up the second github action to force update the streamlit service after our previous github workflow to push a docker image completes. We can add a .github/workflows/update-streamlit.yml:
name: Update Streamlit ECS Service

on:
  workflow_run:
    workflows: ["AWS ECR push"]
    types:
      - completed

jobs:
  deploy:
    runs-on: ubuntu-latest

    steps:
    - name: Configure AWS credentials
      uses: aws-actions/configure-aws-credentials@v2
      with:
        aws-access-key-id: ${{ secrets.AWS_ACCESS_KEY_ID }}
        aws-secret-access-key: ${{ secrets.AWS_SECRET_ACCESS_KEY }}
        aws-region: us-east-1

    - name: Update ECS service
      run: |
        aws ecs update-service --cluster streamlit-cluster --service streamlit-service --force-new-deployment
When we push this, we’ll see first our docker push action run, but once that’s done, we should see the update streamlit action run. Once that completes, the ECS service will begin spinning up a new task and point the load balancer to it when ready!